


What Is Nail Tape And Why You Should Use It

At-home manicures can be fun, yet they can also be a big headache if you don’t know what you’re doing. Cute DIY designs become big messes when you don’t have the proper tools and a bit of patience.
Nail art is super trendy right now, but creating the perfect nail design may seem like an unattainable feat if you don’t have a steady hand.
Don’t worry. We’ll walk you through the steps on how to use nail tape to create some simple nail styles you’ll love without all the mess.
What Is Nail Tape
Nail tape is a tool that helps you construct the nail designs you want. Nail tape is also sometimes labeled as nail striping tape.
It is a mini roll of tape that comes in a variety of colors and can be removed or used as part of your nail artwork. It allows you to create the perfect French manicures, straight lines, and color-blocked motifs.
Nail tape is created especially for your fingernails, with one adhesive side similar to regular clear tape. You can cut pieces off of the roll to get the length of tape you need for each specific design.
Regular clear tape works just as well as nail tape for creating sharp, clean straight lines, color blocking, or helping keep your digits protected from polish while you’re painting.

How To Use Nail Tape For Color-Blocking
Nail tape helps keep your painted artwork from becoming a messy mishap, and it’s super easy to use. You’ll just need a pair of scissors and some tweezers to get started.
♡ Cut the Tape
Cut pieces of tape a little longer than the length of your nail and place the nail tape around the parameter of your fingernails to protect the skin from getting nail polish on it. By cutting it a little longer than needed, you’re creating enough to grab onto so that you can remove it when you’re finished.
♡ Work on Your French Mani
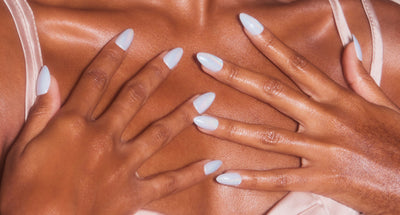
Create the perfect French manicure by covering the tip of your nail with a piece of nail tape that’s just a little bit longer than the length of your nail. Press the tape down securely onto your nail to prevent the color from migrating.
Paint the exposed top part of your nail in the color of your choice. Quickly remove the tape after painting the top part of the nail. If it is not removed quickly, the paint will begin to dry on the tape and could mess up the design.
Paint the tips a different color once the tape is removed. Each nail tip can be painted a different color for a trendy vibe. When the polish is completely dry, apply a shiny top coat for a glossy finish.
To get this look without having to use nail tape, check out the Glamnetic Sprinkles press-on nails.
♡ Color Blocking
Create an easy color-blocked pattern by placing a piece of nail tape down the center of your nail or place it diagonally from one top corner to the opposite corner at the bottom. Make sure the tape is pressed securely down onto your nails.
Paint one half in a fun color and remove the tape carefully and quickly before the paint dries. Once the first half is dry, paint the other half in a different color. Finish with a top coat. Voila! You’ve created a trendy color-blocked pattern!

How To Use Nail Tape As Part Of Your Nail Design
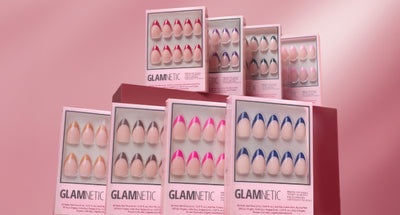
Nail striping tape can also be used as a part of your actual nail design. It comes in a lot of cute colors and finishes like glitters, holographic, and metallic colors.
You will be leaving the nail striping tape on your nails when you use it as part of your design, so choose colors of tape that you want to flaunt. You can get creative with nail striping tape because of the variety of available colors.
First, figure out which design you want to create. Think straight lines, checkerboard patterns, diagonals, and French manicures. These patterns are super popular right now.
Once you have your design chosen, grab your scissors and tweezers to make the application easier.
♡ Paint nails with your base coat and allow them to dry completely.
♡ Paint nails in a solid color of your choice and allow them to dry completely.
♡ Before applying your top coat, apply pieces of your metallic or glittery nail tape in a designed pattern on your nails to create the look you love. Use your tweezers to make the application easier. Make sure the nail tape is cut to the length of your nails because it will not be removed.
♡ Once you have your design laid out on your nails, seal it in with a quick-dry top coat and allow it to dry completely. The nail tape will remain on your nails as part of your design.
To get a similar look without using nail tape, check out the Glamnetic Wild Card press-on nails. These nails are trendy and offer a fun, unique design on each individual nail.
What Are Nail Adhesive Tabs
Nail adhesive tabs are similar to tape but a little different. They are pre-shaped tabs that are used to adhere press-on nails to the actual nail itself.
Press-on nails that are applied with nail tabs cannot be worn as long as press-on nails that are applied with nail glue. Nail tab applications are good for temporary nail wear to match a particular outfit or costume because they can be easily removed within a day or two.

Press-On Nails
If you want an easier way to get salon-quality nails at home that last up to two weeks, try Glamnetic press-on nails with glue. You can kiss drying time goodbye with the two minute application.
Press-on nails can save time and money, plus they are super trendy RN. They come in a variety of shapes, lengths, and colors and are easy to apply and remove. If you aren’t familiar with press-on nails, take the Glamnetic nail quiz. It will help you decide which nail style is perfect for you.
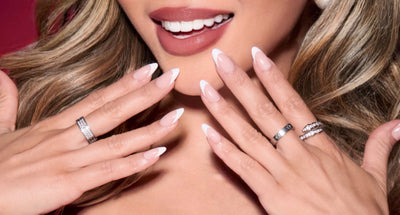
For nails with major Kylie Jenner vibes, try Spotted. These nails offer a long, coffin shape in a fierce leopard print French manicure. If Kim Kardashian is more your style, try Exposed.
This celebrity-inspired nail set is long, coffin-shaped, and comes in a nude color that is oh so glam!

Nail Tape Is Your Ticket to Stunning Manis
When used correctly, nail tape can be a lifesaver when it comes to creating clean, straight lines and designs for your nails. With a little patience, time, and the right tools, you can create any design you dream of.
Press-on nails are easier to apply, take less time, and are less expensive than going to the salon. They have the salon look and require very little effort—it’s basically a win-win.
Whether you’re creating your own look with nail polish and nail tape or applying a pre-designed press-on nail, the options are endless. Pamper yourself with the perfect nails because it will make you feel simply fabulous, dahling!
♡SUBSCRIBE BELOW FOR 10% OFF YOUR GLAMNETIC PURCHASE!♡
Sources:
Art Ideas Using Scotch Tape | Style Motivation
Workshop: Tips and Tricks for Flawless Nail Art | Nail Pro
Color Block Nail Art: Find Out How With These Quick & Easy Steps | Nail Designs

