Can You Paint Over Acrylic Nails

Acrylic nails have been around for many years, but they’ve recently become ultra-popular thanks to celebs like Cardi B, Billie Eilish, and Kylie Jenner.
These celebrities and others wear elaborate acrylic nail sets donned with a host of artistic styles, from jewels and charms to fashion brand designs. Anything goes when it comes to long, luxe nails.
Have you ever wondered if you can change the paint color on your acrylic nails to get that fab new design you just discovered? Your acrylic nails look so perfect after they’re freshly painted, but you may want a color change before it’s time for your next salon visit.
As long as you use acrylic-friendly products, it is perfectly safe to paint over your acrylic nails. That said, we are going to answer all of your burning acrylic nail questions right here, so buckle up, gf!
Quick Facts: What Are Acrylic Nails?
Acrylic nails are designed by mixing a powder polymer with a liquid monomer. This mixture creates a paste that is painted onto the natural nail and a more extended artificial nail tip.
The acrylic hardens over the nails after a few minutes and is then shaped by the nail tech to the desired style using a high grit nail file. Nails can be shaped to a stiletto shape, coffin shape, round, square, squoval, or almond-shaped nails.
Next, a nail tech uses an e-file nail drill to buff the top of the nail plate and around the edges to create a smooth nail shape.
The nails are then painted with nail polish or shellac and sealed with a glossy or matte top coat.
Acrylic nails are very durable, meaning they are difficult to break or crack. Acrylic nails usually last about two or three weeks before they need to be refilled.
A refill occurs when the regrowth of the natural nail is refilled with acrylic to make the nails smooth again. Fills also help correct the lifting of the acrylic on the sides of the nails. Lifting usually happens around the time that the nails are ready to be refilled.

How to Prolong Acrylic Nail Wear
Acrylic nails will last longer if you wear gloves while doing chores and handling water. Water can cause bacteria to creep in between the acrylic and the natural nail, causing some not-so-fun stuff to grow. Wearing gloves can help prevent this from happening.
Cuticle oil is another way to keep your nails looking good in-between acrylic refills. Cuticle oil prevents cuticle dryness and cracking. It also keeps the skin around your nails healthy and smooth. Regular use of cuticle oil and hand cream will keep both your nails and hands hydrated and happy.
How to Paint Acrylic Nails
Your nails look on point with that perfect purple polish until you buy a fire outfit that absolutely doesn’t match. Now what? Don’t panic!
It’s easy to change nail polish color quickly on acrylic nails. Just follow these steps to the perfect re-polishing project.
Remove the Old Polish
First things first, remove all traces of the old un-matchy polish, and quick! One of THE most important things to remember is to use an acetone-free polish remover.
Acetone found in regular nail polish will break down the acrylic nail bed, causing unevenness and, dare we say, disaster. Always reach for acetone-free nail polish remover. This remover is found in the usual stores you would purchase regular nail polish. Just look for the acetone-free label.
Acetone is the liquid that the salon will use to soak off the acrylic nails. So, unless you’re trying to remove your acrylic digits, ditch the acetone.
Wash & Dry
After all traces of the nail polish are gone, wash your hands thoroughly. Wash with warm, soapy water and rinse well.
Dry your hands and nails with a cloth to remove all moisture. This thorough drying is necessary. Leaving water on the nail can cause moisture to seep in between the acrylic and the natural nail, causing fungal growth.
Apply the Base Coat
If you want your nail polish to last longer, a base coat is necessary. The base coat also helps prevent the nails from becoming stained from the nail polish.
Check to make sure that the base coat you choose to use is compatible with acrylics. Using this type of base coat will protect your acrylic nails and the longevity of the nail polish.
Apply one or two layers of base coat to each nail, allowing each coat to dry thoroughly before applying the next.
After the base coat is dry, gather your nail polish and nail art and get ready to paint.
Add a Fresh Coat of Paint
A new coat of color will freshen up the look of your mani, so choose one that matches your new wardrobe or the event you’ll be attending next, and paint away!
Regular nail polish and shellac are recommended for acrylic nails. You should avoid gel polish on acrylics.
Paint up to three coats of polish on each nail. You can use the same color for all of your nails or use different colors. Make sure that each coat is completely dry before adding a second or third coat of polish.
After your polish has dried, you can add rhinestones, charms, or other nail art. Add each piece individually by adhering it carefully to the nail plate with nail glue.
Add lots of art, or none at all. It’s up to you!
Top It Off With a Top Coat
Seal it all in with a top coat. A top coat will prevent your nails from chipping and help keep any gems you have applied in place. Don’t skimp on this step.
Again, make sure that the top coat is suitable for use on acrylic nails. Apply one or two thin coats of the top coat to your nails. Allow each layer to dry before applying the next.
Voila! You just completed your acrylic nail polish change!

Acrylic Nail Removal
Acrylic nails must be removed properly by a professional nail tech. It is easy to be tempted to pick and peel old acrylic nails but forgo this temptation. Picking and peeling will cause severe, maybe even permanent, damage.
A nail tech has the proper tools and products to safely remove your acrylic nails without damaging your natural nail bed.
Can You Customize Press-On Nails?
Absolutely! Press-on nails are actually much more accessible to customize than acrylic nails. These types of nails can be trimmed, filed, and painted much more easily than acrylic nails.
How to Trim Press-On Nails
To trim press-on nails, measure the length you want them to be and carefully cut each one with nail trimmers. Measure each finger’s nail to the other finger’s nail to make sure each one is the same length.
How to File Press-On Nails
Press-on nails can be filed to the desired shape or length with a nail buffer or file grit nail file.
Fine grit nail files are usually glass or crystal. These types of nail files file smoothly and don’t cause micro-tears in the delicate press-on nail material.
How to Paint Press-On Nails
Press-on nails usually come in super cute colors and designs already, so painting probably won’t be necessary. However, if you do want to paint your press-on nails, choose a paint that is safe for acrylic nails.
Paint one to three coats of color onto the nail, allowing each coat to dry before applying the next. Apply a top coat over the paint to prevent the paint from chipping.
Conclusion
Acrylic nails can be painted and re-painted as long as you use acetone-free polish remover. The base coat, nail polish, and top coat you choose must be safe for use on acrylic nails also.
Never remove your acrylic nails at home. Doing so will cause damage to your natural nails.
Press-on nails can be trimmed, filed, and painted also. Press-ons are much easier to work with than acrylic nails.
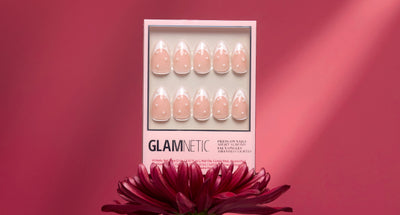
Glamnetic press-on nails are a simple solution to your nail struggles. Our press-ons come in colors and styles that you won’t want to paint over, and they’re easy to apply and remove. The on-trend designs are super cute, so you know you’ll be in style with every nail set you wear.
Go ahead, get creative. Design your own nail set and tag us @GLAMNETIC.
♡SUBSCRIBE BELOW FOR 15% OFF YOUR GLAMNETIC PURCHASE!♡
Sources:
Ways to Wear the Almond Nail Shape — Best Almond Nail Designs | Cosmopolitan


